Showing posts with label Trailer. Show all posts

DIY – Hobie AI Trailer

It’s not so long ago since I put the finishing touches to the latest incarnation of my kayak trailer. Since I wrote that article I’ve extended the drawbar by a metre which basically made it ideal for my Adventure Island. I’m still awaiting the Hobie AI cradles, hopefully they’ll be here in the next month or so. Though in the mean time I placed some 110mm waste pipe on the bottom slot which permits both the Outback and AI to sit fully supported. The outriggers on the AI have additional removable foam supports to prevent them rattling about. Both the kayak and the outriggers are secured with straps for travelling.

Loading is the reverse of unloading and it’s proving very straightforward. I took a couple of photos to show how I load it up, it might prove helpful to those folk who are looking for a suitable trailer for themselves.

With the seat and sail removed I trolley the AI up to the rear of the trailer and lift the nose onto the support tubes.

Stepping to the rear of the AI I take the weight off the rear and push the AI forwards until the trolley touches the lighting board.

Removing the trolley retaining pin causes the trolley to fall free and this can be recovered from the ground. It’s then simply a case of pushing the AI forward into the central position and securing it for the road.

It really is as simple as that!.  The trailer is rated at 750kg gross, thus I can happily carry/store various combination of kayaks, though for me it’s a maximum of two Outbacks and the AI.

Kayak Trailer – Mk3 (work in progress)

Over the past few years I’ve had a couple of attempts at making a kayak trailer, there was the Mk1  which was a beast, bought as is and basically not up to the task. Little time was wasted on it and it was moved on rather quickly. Mental note: don’t buy blind of Ebay without having seen such items in the flesh. Then I progressed and put a lot of work into the Mk2, a much improved beast, though it’s too heavy and the massive storage space was under utilised.

I wanted something lightweight, something that could carry my Hobie Outback and my soon to arrive Hobie Adventure Island. ‘Off the shelf’ kayak trailers don’t really cater for this, not with fishing kayaks generally being much wider than traditional kayaks and canoe, plus the AI is a beast in itself. After giving this some thought, I purchased a motorcycle trailer (3 bike model) that had a well built galvanised frame with a maximum capacity of 750kg.

One thing I also liked about this particular trailer was the extendable light board, though it turned out that it didn’t extend nearly as much as I would have liked. It also had rear support legs to enable the trailer to be stable when unhitched from the vehicle.

I was also thinking ahead, I also wanted to have some removable storage capability on the trailer as well as the option to fit a roof tent in the future, something I’d need to consider when designing the frames.

Most kayak trailers tend to have two main frames to support the kayaks, I decided to fit three, partly to spread the weight, though mainly to permit fitment of a roof tent and a aerodynamic roof box as required. I also needed two of the frames to be 67” apart to permit the correct fitment of the cradles for the Hobie AI. A distance of 67” was too big to fit a roof box or roof tent, so the third frame was a must.

I gave a lot of thought on how to fix the frames to the trailer’s main frame. I really didn’t fancy bolting them (lots of drilling required into  a nicely galvanised trailer) and welding was a no go for the same reasons. Hence I decided on U-bolts as used on trailers. High tensile items, more than capable of clamping the frames firmly into position, permitting them to be re-positioned if required.

For the frames I used 30mm box section steel, 3mm in thickness. Some may consider this over-engineering, though add 80-90kg of kayaks, a roof tent and two adults and it should make a lot more sense. These would be welded for strength and neatness. I welded short sections of 50mm steel angle (6mm thickness) to the base of the frames that permitted the frames to ‘sit’ onto the existing trailer and to be securely clamped into position.

The above photo was taken during early assembly, the roof box was placed onto the rear two frames just to get it out of the garage whilst the front frame was awaiting fitment, though for normal use if will be placed on the forward to frames to improve weight distribution. The centre frame is positioned forward of the trailer axle for the same reason, frames weigh in at around 40lb (18kg) each.

As mentioned earlier, the trailer features an extendable lighting bar, though it only extended about 50cm. The main trailer frames are 200cm long, so I welded 220cm steel tubes (2mm) in place of the originals, permitting me to extend the bar comfortably up to 150cm out to the rear.

I have fitted so 25mm galvanised steel mesh sheet (2.5mm gauge) to the base, it’ll enable me to easily attach items for carriage as required, it’ll also enable the trailer to be used for household duties when needed.

So what’s left?. Well I’m extending the drawbar by a metre so it can effectively carry my kayaks when they’re positioned centrally on the trailer. The extension has already been manufactured and galvanised, I’m just waiting for of a bag of bolts to finish the job. The jockey wheel will also be moved forward by about a metre to improve weight distribution and the spare wheel will also be positioned towards the front. The trailer is still light and easily manoeuvrable, with suitable nose weight it should be a pleasure to tow.

I’ve been researching roof tents that are suitable for the UK & European climates for some time now, most tend to be designed for warmer countries and I fear they wont have the longevity that I require. Weight is also a major consideration.

I should have the trailer finished in the next 3-4 weeks, I’ll post an update with photos of the finished item soon.

Kayak trailer – 2nd attempt ! (Part 2)

If you’ve not yet read Part 1 of the trailer build, you can view it here: Part 1

I’ve been steadily busy with the trailer most weekends since my last post, managing 2-3 hours here and there. The main achievement was getting the kayak bars TIG welded into place. Cheers to Jim for finding the time to deliver the trailer to my welding contact whilst I was working away in Somerset. The guy really does do a top notch job at welding, the bars could easily be used to lift the trailer, exactly the sort of strength and quality of build that I was looking for.

I decided to cover the bars in foam lagging, secured in place with ty-wraps. Once in position two layers of heavy duty black masking tape provided a durable top layer, and an easily replaceable one at that. This was the same construction as used on my car rollers bars.
Below is a photo of how it was left in part 1

P1110995

Now with the bars TIG welded into place and suitably covered…

P1120247

I’d attached latches to the lids and fitted stainless R-pins. I since added small lanyards to these pins to help prevent inadvertent loss. It’s the small details that count.. honest !

P1110999  P1120227

When I’d extended the drawbar the 50mm steel box section was bolted below the front A-frame, whereas before it’d been mounted above the A-frame. This resulted in the trailer having a slight nose-up attitude, this would only worsen as the trailer was loaded. I decided to bolt an additional short section of 50mm box the to upper side of the drawer box effectively eliminating this problem.

I took this opportunity to fit hardened tamper proof covers to the hitch bolts for improved security. I also wanted a connection point close to the tow hitch to allow the trailer to be secured to the vehicle, or when not it use to a strong point of some description. This was achieved by fitting oversize stainless ring bolts to both the trailer and the vehicle tow hitch.

P1120225

Note the slot in the trailer tow hitch, this was required to allow the hitch lock to fit correctly post the fitment of the additional section of 50mm box section to the upper side of the trailer tow bar. It was quite a tedious job to slot through the hitch and box section, though the end result was worth the effort.

The trailer has been lined out with removable 3mm rubber matting to provide a non-slip floor and ultimately to provide protection to the paintwork. The lockable cupboard was lined with the same material, as was the top surface of the cupboard to provide a convenient working surface when the trailer lid is opened.

P1120238  P1120239

P1120244  P1120245

The trailer had initially been overly nose heavy (62lb at the hitch) post the fitment of the extended drawbar. I overcome this issue by doing two things. Firstly I fitted the spare wheel internally and to the rear of the trailer. This provided security for the wheel itself whilst moving the trailer balance point further aft. This wasn’t enough by far so I decided to bolt a steel double jerry can holder within the rear of the trailer, which with a single container of water balances the trailer up nicely. The spare wheel is secured to the jerry can holder with a shortened roof strap, simple and effective!.

P1120245a

Being able to carry water or fuel safely within the trailer can only be a good thing. Whether is be water for camping, or merely for rinsing the kayak/equipment off post a trip. Clearly there will be kayak/fishing equipment to be loaded as required and positioning this suitably will provide a nicely balanced trailer. 

I designed the trailer to be able to carry 2 large kayaks face down, side by side. However, with the use of J-bars it would be more than capable of carrying 3-4 kayaks. I’ve clocked up a few miles driving around locally with a trial on the highway and I’m more than pleased with the result.

P1120228

P1120230

P1120236

As can be seen from the above photos the kayak can be easily and quickly secured to the roof bars. Fitting a security cable through the scupper holes and trailer lifting ring provides peace of mind against theft whilst in filling stations, camping, etc.

I still have a few further improvements in mind, though I’m planning to use the trailer for a few weeks before carrying out any further modifications. Cost to date is around £350, certainly no more than £400, which I reckon is an excellent price considering the final result.

Untitled-3  P1120228

Untitled-6  P1120244

U1926-2  P1110986

Untitled-2  P1120247

I’ve since made better use of the lockable cupboard space by adding a set of drawers. At the top is a sliding shelf to which I’ve fitted a 2 hob gas burner Not shown in the photos), the butane bottle being situated and secured within the main trailer storage space. The two drawers can be used for the storage of food, bottled water, pot, pans, etc, etc.

drawer1  drawer2

I think that’s about it where modifications are concerned. The trailer has only seen action on a couple of occasions where it performed well, no complaints.

Kayak trailer – 2nd attempt ! (Part 1)

Many months ago I purchased a trailer which I’d hoped would have proved suitable as a kayak trailer. It was never going to be that simple as it has to cater for other requirements such as general household duties, etc.

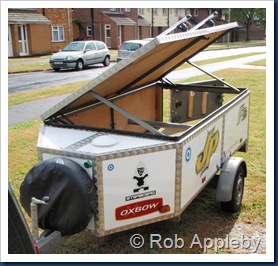
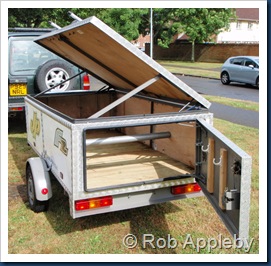
The trailer that I’d purchased earlier did on the face of it seem fairly suitable.
trailer3  trailer4

However various problems were evident at a fairly early stage. The lid was a massive one piece affair, though it was the nature of its construction that turned it into some thing rather nasty. The lid has been constructed using a steel frame made from 1” angle. This had no real strength to it and it lacked any rigidity. Two sheets of 3/4” plywood were bolted to this making the whole one piece lid extremely heavy. This was in turn covered with PVC sheeting and aluminium cappings. It was a beast!. On stripping it down it was clearly evident that it was far from watertight with both sheets of plywood suffering from severe water damage.

So the first issue was the lid. A new custom lid manufactured from heavy aluminium angle and covered with aluminium sheet was planned to replace it. This dragged on for months and my planned route of getting this manufactured on the cheap finally fell through. Parts alone for the lid were going to run to well over £100. The drawbar height was way too low so the front frame was going to require a swan neck conversion of some description. As time went by I finally decided that there was too much work involved. It didn’t help that I also work away during the week so I decided to sell the trailer and hunt for a more suitable replacement.

Trailers sell for pretty stupid money at times and finding something suitable was a slow process with many hours spent trawling Ebay.

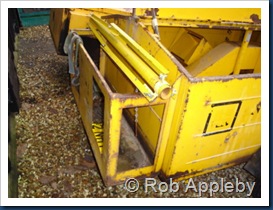
I did eventually come across a chap selling three steel trailers. These trailers had originally been designed to power temporary traffic signals. They had a separate compartment for an engine and a large space accessible by two hinged lids. Out of the three for sale there was only one that appealed. The other two were constructed differently and lacked potential. It didn’t look too pretty, though it was clear the surface corrosion was fairly superficial and hopefully little repair action was going to be required.

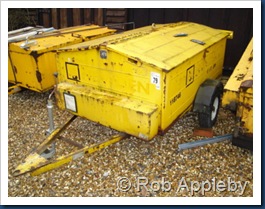
Untitled-1

Untitled-3  Untitled-2

On the plus side the wheels and tyres were in excellent condition with the tyres looking almost new. The seller fitted a new 50mm tow hitch prior to me collecting the trailer.

Untitled-5  Untitled-6

The interior of the trailer sported an array of metalwork bolted and welded to the structure. There was a large central rectangular exhaust duct plus brackets for housing lighting controls, etc. I was curious as to how the trailer has been previously rigged for its intended purpose so I surfed the internet and found a couple of complete trailers for sale from plant hire companies. A trailer in similar condition to mine complete with engine and lights was selling for £1700. Oh, I forgot to mention that I managed to pick mine up for under £130, what a bargain!
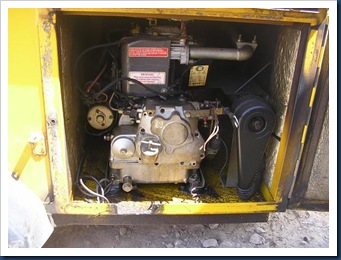
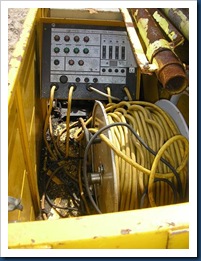
U1926-2  U1926-5

Anyway, mine came without engine, cabling and traffic lights. It was duly collected and towed the 30 miles home. It towed well despite being somewhat nose heavy, though this was something I intended to address during its overhaul. The first thing I did was to strip out what I could, this basically meant removing the exhaust duct (almost a 2 man lift!) plus the various brackets that were no longer required. The lids had a ‘full width/height ‘top hat section’ spot welded to the inside of the lids to provide improved rigidity. These were heavily corroded and had to be removed. The engine compartment was heavily insulated and this was stripped out. The sound deadening foam was soaked in diesel so I was pleased to finally get it all removed. There was a large bracket bolted to the rear of the trailer that had been used to store signs,etc. I finally decided to remove it as I didn’t really want gear stored outside the trailer. It was hellish heavy and the final result was a large pile of scrap metal outside the house, 50-60kg at a guess, perhaps more.

The next problem, and by far the biggest, was to remove the surface rust. I was going to let the local sandblaster do the work, though after a ‘special price’ of £150-200 cash I decided that a day or two of hard graft would achieve a similar result. I wont lie, it was hard and dusty work. I used a heavy gauge wire cup brush mounted into an angle grinder and made an excellent job of removing the surface rust. However, the surface itself was still going to require some suitable treatment to effectively kill the rust. After much searching I was pointed in the direction of a product called Fertan. The product has a tannic acid base and effectively neutralises the rust leaving a hard black top coating which is suitable for painting. Once this was complete a good coat of Galvaroid zinc primer was applied to the trailer lids and other areas that had suffered the worst corrosion.

Removing the corroded ‘top hat’ sections from the underside of the lids had resulted in the lids flexing far more that I would have liked. I fitted 2 full length pieces of 3mm aluminium angle to each lid which restored some rigidity to them.
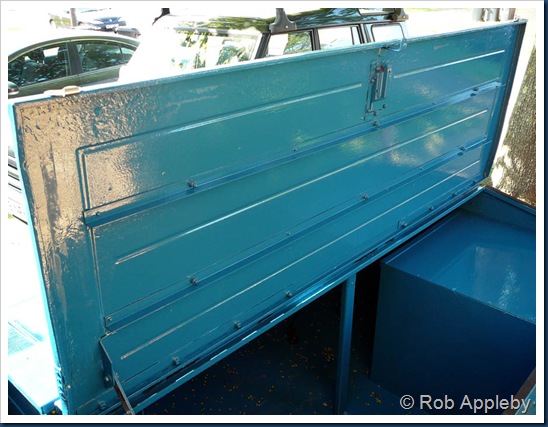
P1110983

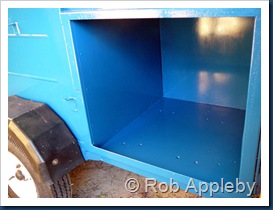
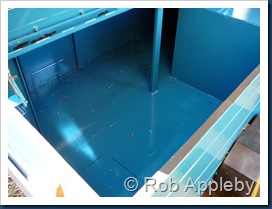
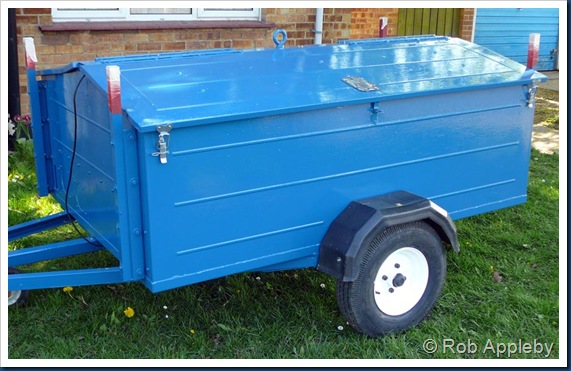
The painting has been a never ending task with most surfaces getting a coat of zinc primer, two coats of red oxide primmer and two coats of blue gloss. With the trailer now stripped of the mountains of metalwork and suitably painted it’s finally starting to look like a usable trailer with plenty of storage space.
P1110987  P1110988

P1110990  P1110986

The floor area is to be covered with 3mm rubber sheeting and I may line the sides to a height of 12” with the same material, I’m currently undecided as to whether side protection is worthwhile or not.

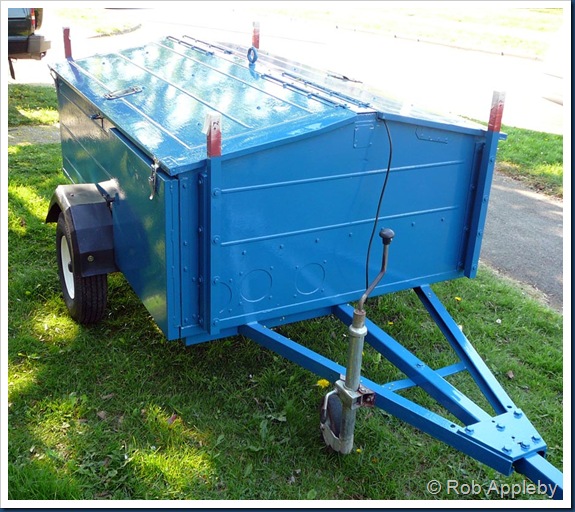
Another issue was the length of the drawbar, it was too short. I wanted the trailer sufficiently far away from the car as to still allow the rear door to be opened with kayaks loaded. A longer drawbar would also make reversing the trailer so much easier. A 2m length of 50mm box steel was bolted into position to achieve the desired result.

P1110994

Here’s a few snapshots of the trailer.
P1110996

The trailer is still too nose heavy (though I have a simple solution) and there are still other modifications that I want to embody.

I’ve already addressed the kayak bars though the cross bars still need TIG welding in place, so I’ll cover these at a later date. I will be wrapping the bars in foam and covering them in tape, very similar to my car roof bars. I’ll probably incorporate a roller bar into the rear kayak bar. I envisage being able to load/unload a rigged kayak if required when moving from one venue to another. The width of the kayak bars will allow two kayaks to be loaded with ease.. If J-bars, or similar, were used then 3-4 kayaks could be carried if required.

P1110995

P1110998

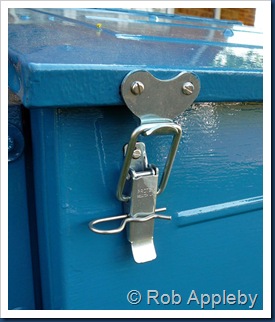
The lids weren’t too straight so I attached latches to the corners of the lids to allow them to be fully tightened against the seals. The R-pins are to be attached to the latch with a short stainless lanyard to prevent them being lost.

I will be swapping the trailer between two vehicles so I incorporated a ‘stud’ mounting affair into the trailer board. This allows plates to be quickly removed and fitted using stainless wing nuts.
P1110999  P1120003

I’ve now started to modify the trailer to make it more camping/expedition friendly. If you’d like to see more take a look at part 2 to view the next stage of the build.